
Cura 5.X Extruder Change-over Plugin for Weedo X40 PRO
With the help of the plugin you can insert the M924 command that triggers a change from the extruder. The M924 command corresponds to a manual extruder change-over, but also has the option to cool down the unused extruder.
Command: M924
Option: S0 = Extruder temperature is maintained
Option: S1 = Cooldown unused Extruder after change (default)
Target Extruder: T0 = left Extruder
Target Extruder: T1 = right Extruder
X40 PRO firmware 1.2.5.9 RC3 or newer is required for use, otherwise the plugin will not work!
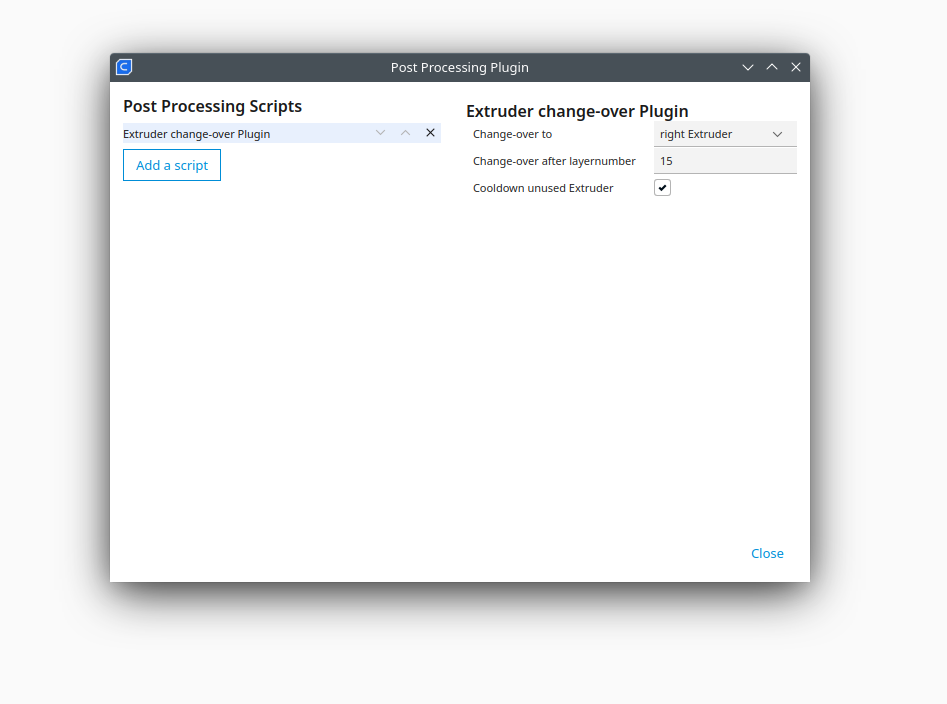
Image: Weedo X40 PRO Plugin Release 1.0.0
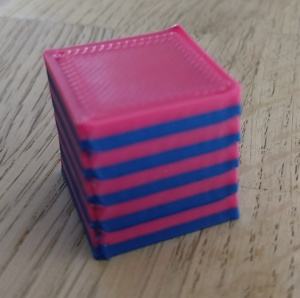
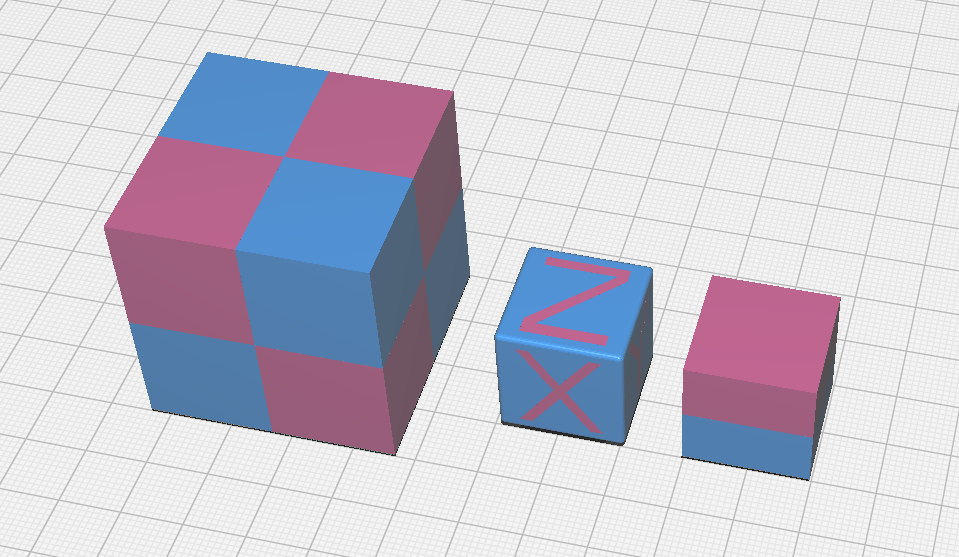
Change-over Example:
In the example, the standard cube was given a zebra look using the Extruder change-over plugin.
Feature from Release 1.0.0:
- G-Code auto conversion
The script automatically detects which operating system is being used. To avoid the display bug, the gcode is automatically converted to the DOS standard in Linux and MacOS. - Change-over to
Here you can indicate whether you want to change from the left extruder to the right or from the right to the left extruder. - Change-over after layernumber
Here you can specify at which layer the M924 command should be inserted - Cooldown unused Extruder
If you change the extruder manually via the touch display, the unused extruder will be cooled down after the change with the X40 PRO firmware. This can lead to problems with frequent switching between left-right, right-left, etc. and also to a longer printing time, as the cooled extruder first has to be heated up again. This option allows you to disable cool down.
Use with other scripts together:
You can call the script multiple times in Cura and switch back and forth as you like. The plugin also works together with the Weedo X40 PRO plugin.
Download:
Cura 5.X plugin
- Extruder Change-over Plugin 1.0.0 (only for X40-Community member)
Installation
Installation Cura 4.X for Windows:
Copy the script X40Shnapshot.py into the Cura subdirectory:
plugins\PostProcessingPlugins\scripts
Installation Cura 5.X for Windows:
Copy the script X40Shnapshot.py into the Cura subdirectory:
share\cura\plugins\PostProcessingPlugin\scripts
Installation Cura 5.X for Linux:
Copy the script X40Shnapshot.py into the Cura subdirectory
~/.local/share/cura/5.0/scripts
Application:
Click in Cura:
- Extensions -> Post Processing -> Modify G-Code
- Now add the script.
The script is now permanently active for all projects. If you don't need it, you have to actively remove it again.
- Details
- Hits: 21775
Cura 3D-Model Plugin
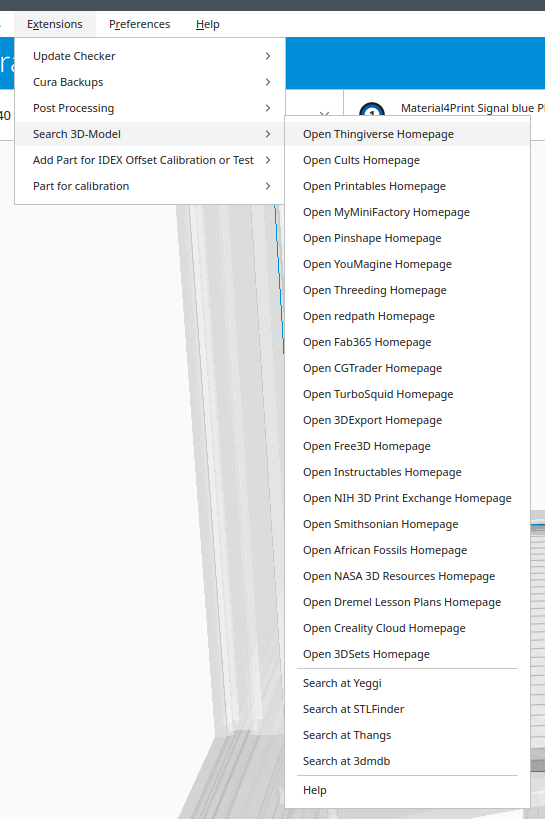
This Cura plugin adds links to the best 3D-Model Repositorys and Marketplaces. A browser must be installed and an Internet connection must be available to open it.
If you know other good sites with STL data, then you can send me the link.
Download
- Details
- Hits: 21910
Cura 5.X keyboard shortcuts
With Cura, most people will only use the keyboard to enter values or file names. With the use of keyboard shortcuts, however, the work can be greatly simplified in some cases.
Here is a current overview of the keyboard shortcuts for Cura 5.X:
| Shortcut | Function | Annotation |
| STRG + N | New Project... | |
| STRG + O | Open File... | |
| STRG + S | Save Project... | |
| STRG + Z | Undo | |
| STRG + Y | Redo | |
| STRG +A | Select All Models | |
| STRG + R | Arrange All Models | |
| STRG + M | Multiply Selected | |
| Select + DEL | Delete Selected | |
| STRG + D | Clear Build Plate | |
| STRG + G | Group Models | |
| STRG + ALT + G | Merge Models | |
| STRG + SHIFT + G | Ungroup Models | |
| STRG + P | Slice | |
| STRG + J | Preferences Profiles | |
| STRG + K | Preferences Materials | |
| F11 | Toggle Full Screen | |
| F5 | Reload All Models | |
| Select + STRG + 1 | Assign left Extruder to selected model | Extruder must be active |
| Select + STRG + 2 | Assign right Extruder to selected model | Extruder must be active |
| Select + T | Move model | |
| Select + S | Scale model | |
| Select + R | Rotate model | |
| Select + M | Mirror model | |
| Select + E | Support Blocker |
- Details
- Hits: 7529
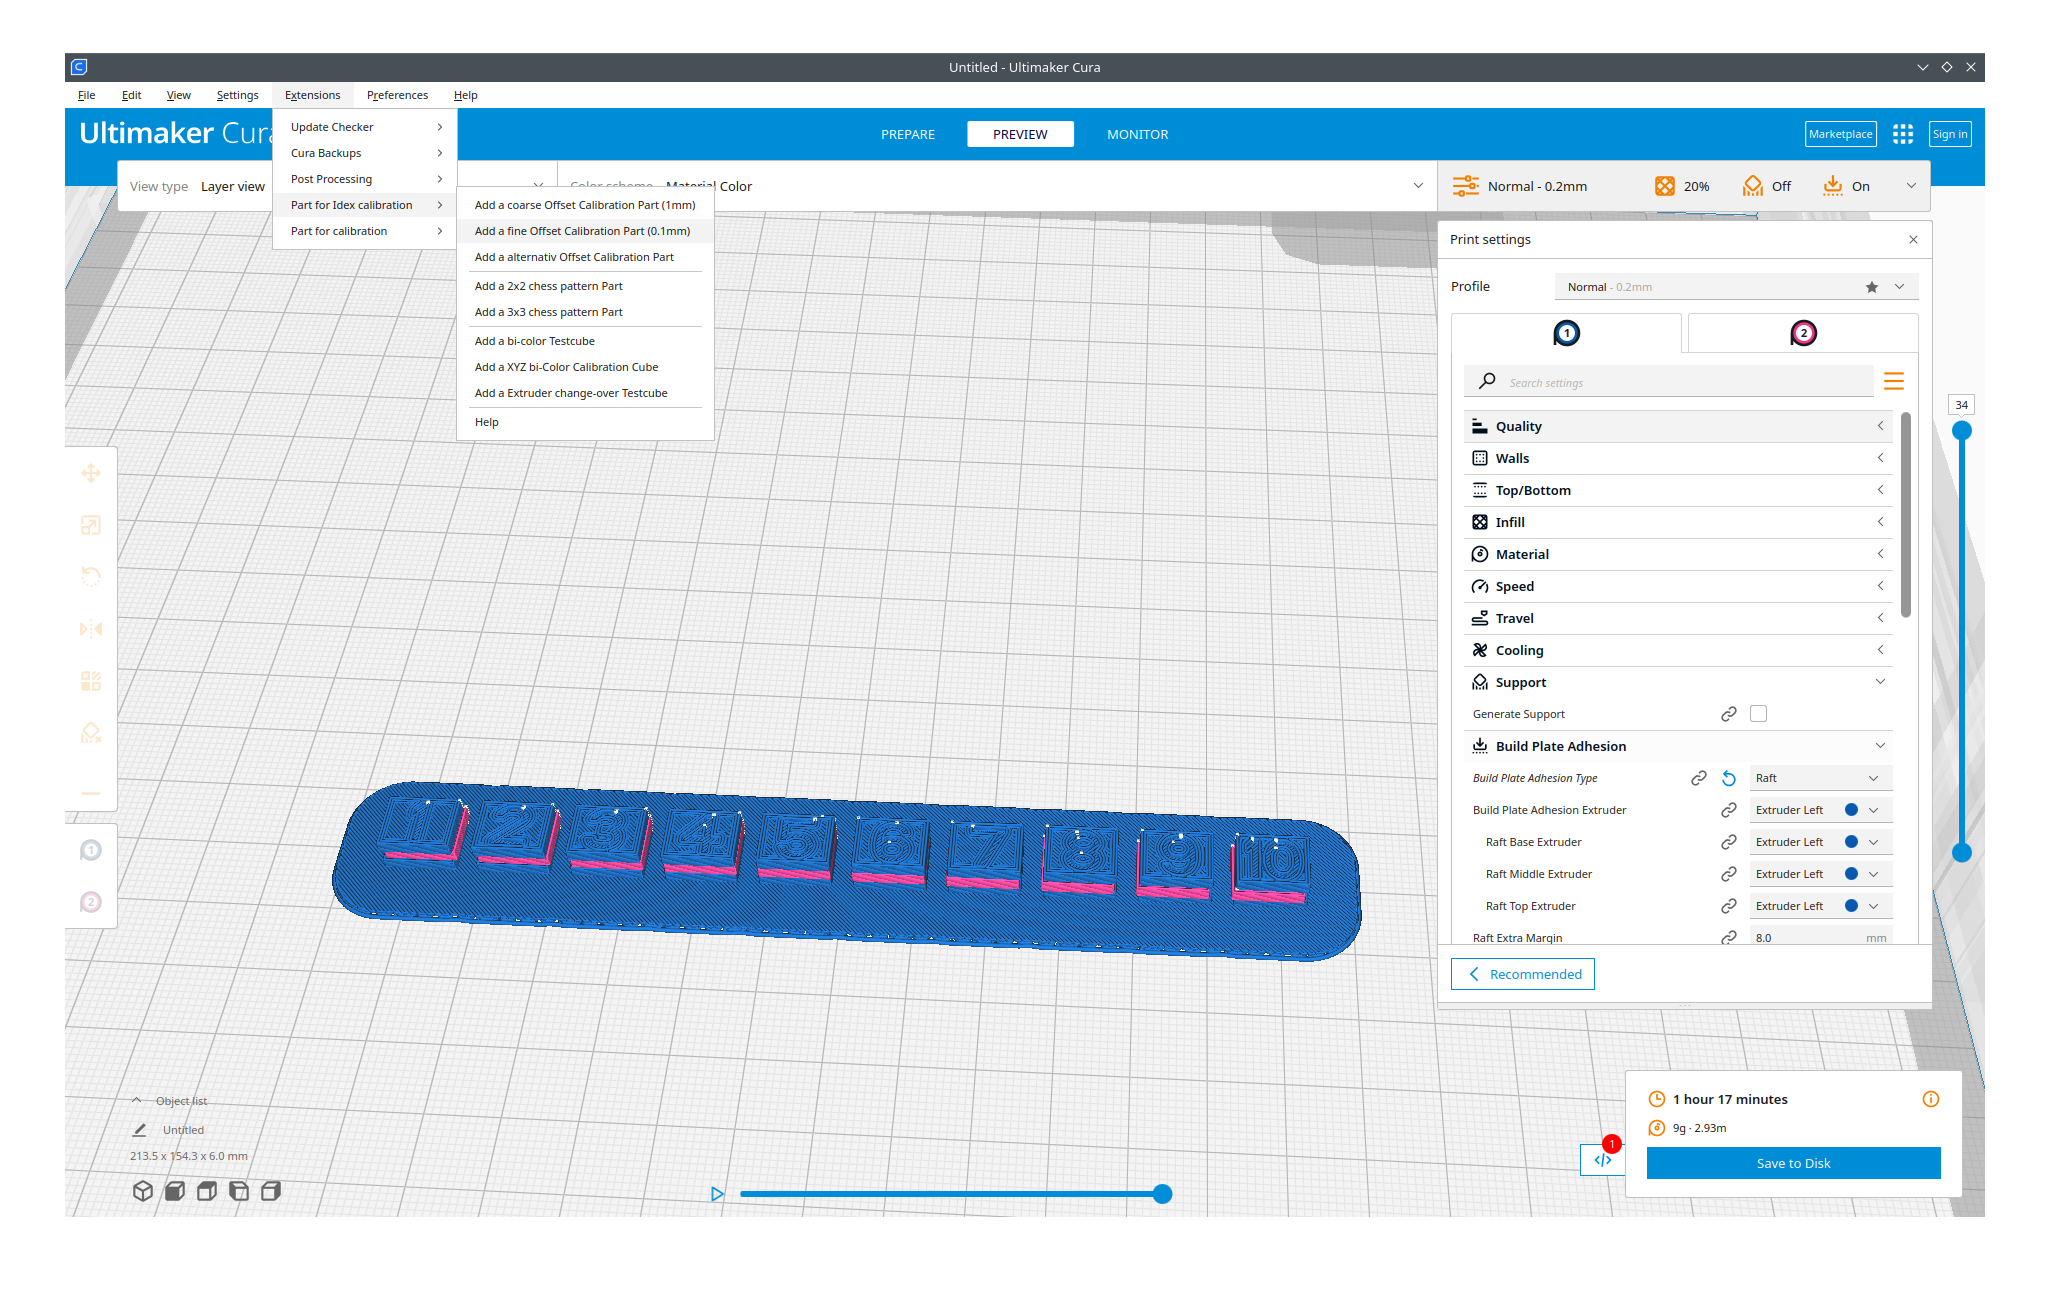
Cura Idex Calibration Parts Plugin
With IDEX printers, the print heads must be aligned with one another so that an unwanted offset occurs when changing from one extruder to another.
The plugin is used to simply insert corresponding calibration parts with which the offset can be determined or checked.
The Cura plugin was tested with Ultimaker Cura 5.2, but should also works with Cura 4.X.
Changelog
1.0.0
- Initial release
1.1.0
- Add manual and calculation tool
1.2.0
- Integrate select all and merge models
Download
- IDEX Calibration Parts 1.2.0
- IDEX Calibration Parts 1.1.0
- IDEX Calibration Parts 1.0.0
- IDEX Calibration Parts Source Code (github)
Weedo like XY-Offset calibration parts
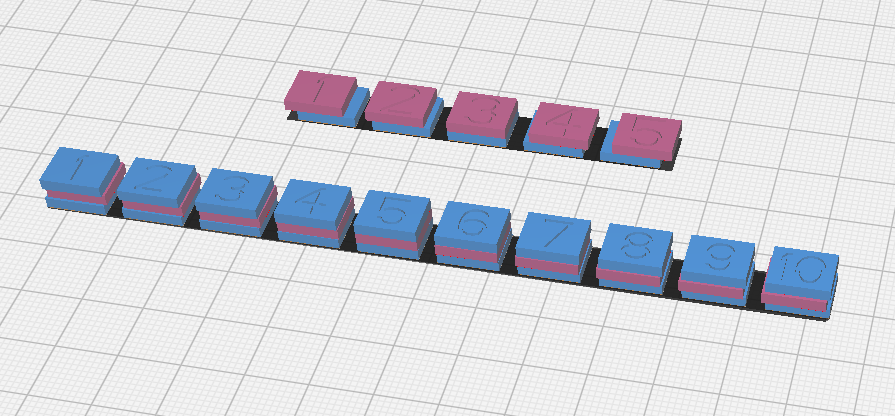
Alternativ calibration part
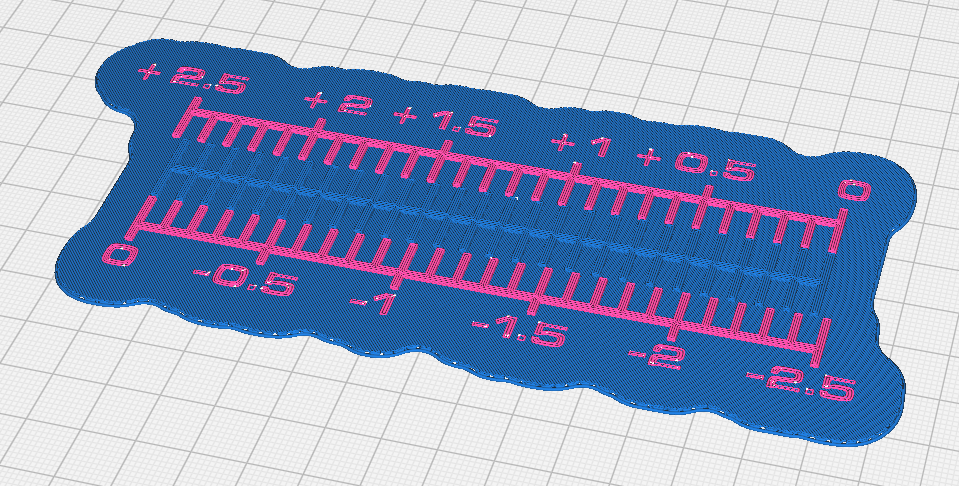
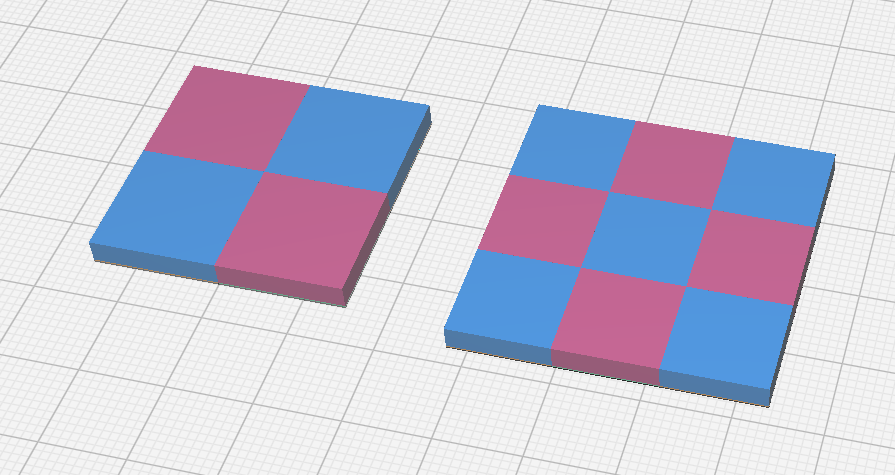
Chessboard pattern parts for high-precision calibration with a caliper gauge
For application see Set the XYZ offset
Offset verification parts
- Details
- Hits: 23011
Increase Cura speed with plugin
Ultimaker Cura is not exactly the fastest software due to the Python programming language. Especially with many printing profiles, it becomes particularly slow.
The fact that the X40 community project supports over 50 filaments, each with 11 printing levels for each color, makes Cura particularly slow.
Not all filaments are almost always required, so I would like to show you here how you can only load your favorite materials without deleting configuration files.
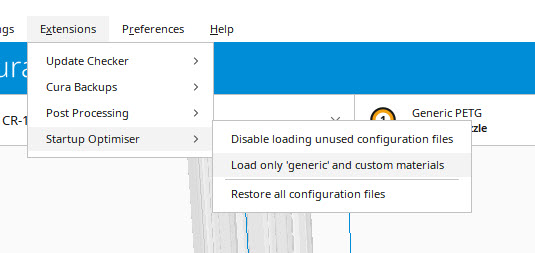
The Cura Startup Optimiser Plugin
With the help of the Cura Startup optimiser plugin, you can simply suppress the print profiles released in the printer definition and then only release your favorite materials again.
Simply install the Start Optimiser plugin via the Cura Marketplace and after a restart click on Extensions -> Startup Optimizer -> Load only generic and custom materials.
After a restart, most materials are no longer displayed due to a blacklist.
Edit the blacklist
The blacklist can be found in the cura.cfg file at: C:\Users\XXX\AppData\Roaming\cura\5.1
Of course you have to replace the XXX with your username. In the cura.cfg file you will find the suppressed materials in the [start_optimiser] section. All you have to do now is remove all the materials you want to use from the blacklist and restart Cura. Make a copy of the cura.cfg file before changing it. If there is an error, Cura will otherwise crash and, in extreme cases, you can reinstall Cura.
By clicking on Restore all configuration files you can undo everything if necessary. However, the blacklist is also deleted in the process.
Attention
| With the latest X40 PRO Cura configurations, there is only one set of quality and intent profiles for the filament. Most of the time, black is the master color. So if the master color is suppressed by the blacklist, then all other colors from the filament will not work either. Therefore, please always remove or add all colors to the filament from the black list. |
Improvement
The plugin isn't exactly perfect. I've asked the developer to add a feature that will only show materials that are marked as favorites. Maybe there will be an easier solution in the future.
- Details
- Hits: 5859