X40 PRO Extruder upgrade
The Weedo 40 extruder is one of the weak points of the device. Actually, you don't want to spend money on a new extruder right away after you buy it, but at some point the extruder drive pinion will lock up or you want to process very stiff filament and that doesn't work because the material transport doesn't work properly.
I would therefore like to introduce you to an upgrade option here. The BMG extruder was originally developed by Bondtech and is also available in similar versions from other manufacturers.
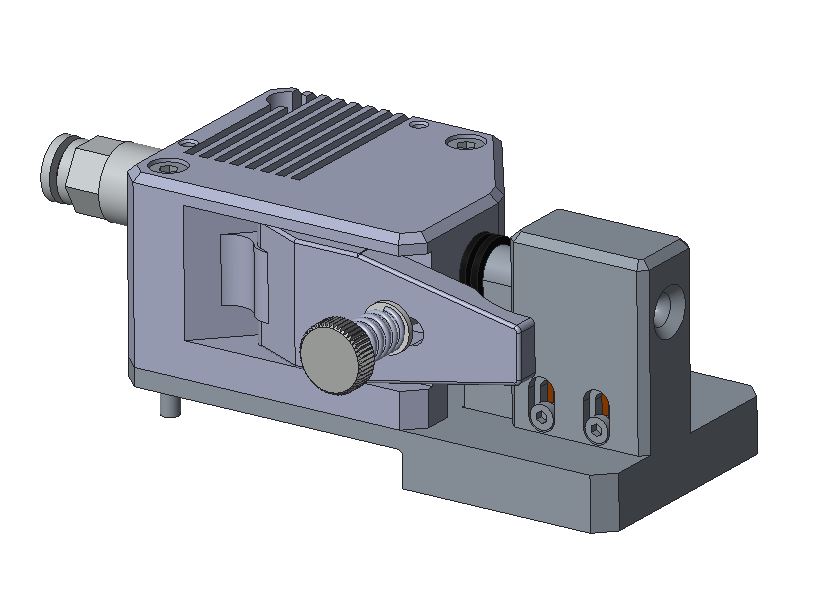
The BMG extruder has a gear ratio and two drive gears between which the filament is clamped. Due to this design, the extruder can generate high thrust forces very precisely. It is hardly possible for the filament to slip through. In addition, the extruder is made entirely of metal and is also available as a left/right version. Ideal conditions for a durable Idex printer upgrade.
BMG advantages:
- Extremely high feed force
- LH/RH variant fixes the small bending radius of PTFE tubing on the left Weedo extruder
- The extruder enables printing with smaller nozzles with a diameter of 0.2mm
- Due to the gear ratio, the filament is extruded evenly even at slow printing speeds. The printed image should therefore be improved at slow and very high printing speeds.
- Durable as it is made entirely of metal and has ball bearings
Due to the slightly higher overall height of the extruder, the height of the installation space is somewhat reduced. If you want to avoid a collision with very high parts, you should reduce the build volume height in Cura. The slightly higher design has no effect on the synchronization of the Z-axes in the bed leveling function. The synchronization just takes a little longer.
For the upgrade I used the Fysetc BMG extruder. The left and right variant together can be found on AliExpress for less than 50EUR.
Shopping links see Weedo X40 Wear parts, spare parts and tuning parts
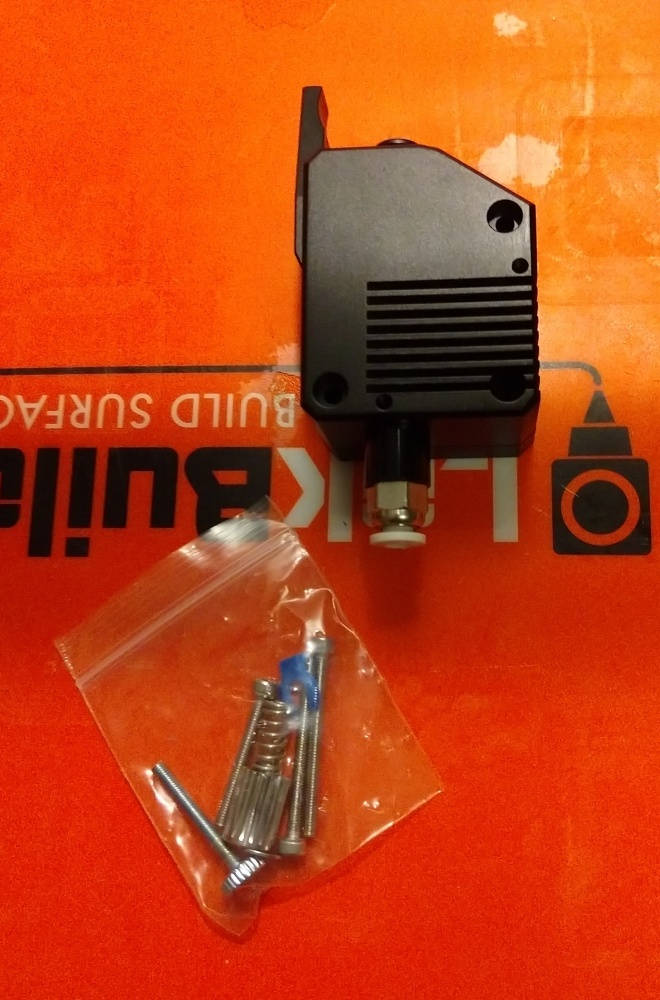
Fysetc BMG RH Extruder
However, an adapted firmware is required for use with the Weedo X40, since the direction of rotation has to be reversed with the right extruder. The X40 PRO BMG variant can therefore be downloaded from the X40 community cloud.

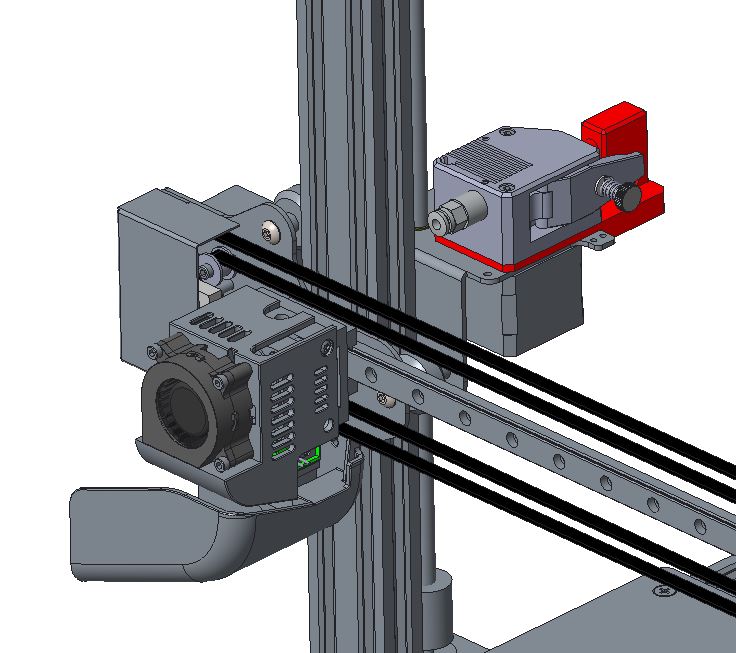
Installed Fysetc BMG LH Extruder
Installation and setup from the extruder
After installing the BMG extruder, you must update the firmware to the X40 PRO BMG variant, because the direction of rotation must be reversed for the right extruder. The X40 BMG PRO variant already contains the calibration of my Fysetc all metal BMG extruders.
Extruder and axis calibration
Please note:
If you want to use the X40 community print profiles without an adjustment, then you have to calibrate the printer with the reference material AddNorth E-PLA. All other print profiles, if necessary, are an offset to the E-PLA.
Even if you use the same extruder and the parameters are stored in the firmware, you must carry out an extruder and axis calibration for dimensionally accurate parts, since the manufacturing tolerances of the extruder and also the belt tension affect the result.
- Reset the calibration parameters to an integer value. To do this, connect the computer to Pronterface or OctoPrint via USB and send it the following control command:
M92 X94 Y94 Z400 E390(for Fysetc BMG Extruder)M500 - Remove the Bowden cable on the extruder, add the extruder filament with the most exact 1.75mm diameter possible. Cut off the protruding end directly at the extruder. Heat the nozzle to around 200°C and extrude 100mm of filament. Cut off the protruding piece of filament on the extruder and measure the length. You can easily calculate the new E-Steps on the TechingTech homepage. Save the new E-Steps using the M92 command and repeat the process to check the filament length.
M92 E388.64M500 - Print a rectangle with a line thickness of 0.4mm and a layer height of 0.2mm as described under Teaching Tech Slicer Flow Calibration. Calculate the new flow parameters and transfer the new flow values to the printer with the M221 command. You can't save the M221 value with the M500 command. Please add the M221 command with the new value to the Cura startcode. The material flow from the M221 command is not overridden by Cura, but the M221 flow and the Cura flow values are multiplied. After you have corrected the flow using the M221 command, you should repeat the print test with the AddNorth E-PLA at 100% material flow and a line width of 0.4mm. If you have done everything correctly, the wall thickness of the print object should now also be 0.4mm.
If you don't want to use the M221 command, then you need to adjust the Cura Flow value of all printing profiles. The printing result is identical!
Please remember to reinsert the parameter when updating Cura!M221 S89(add the M221 command in the Cura startcode to adapt the printer to the X40 community printing profiles) - Now the axes have to be calibrated. To do this, do a bedleveling and z-offset beforehand so that the printer has the best possible basis. Follow the How to calibrate the Weedo X40 printer. Print out the XZY calibration cube with AddNorth E-PLA (Flow 100%) and check the dimension.
- To verify the calibration, print the XYZ cube this time with a scale of 200%, resulting in a cube with an edge length of 40mm. The finished cube should deviate from the nominal size by a maximum of 0.1 mm in the XY direction. If the discrepancy is larger, you did something wrong or didn't work accurately enough.
Runout Sensor
The runout sensor also doesn't work for many. The defect is often not recognized because the test program does not check the sensor.
Download:
Useful hints
A clogged nozzle can cause filament to accumulate in the extruder, leading to further errors. Since the filament accumulates in the extruder housing, the problem cannot be seen from the outside. If the nozzle is clogged, the extruder should therefore also be dismantled and taken apart.