How to use a Dual-Extruder printer with Cura
With a dual extruder you can use two different filaments in one print without having to stop the printer and change the filament. In this tutorial I would like to show you how to use the Weedo X40's dual extruder with Cura and what you should consider when selecting the material and making the settings. We assume that you are using the X40 Community Cura configuration for the Weedo X40.
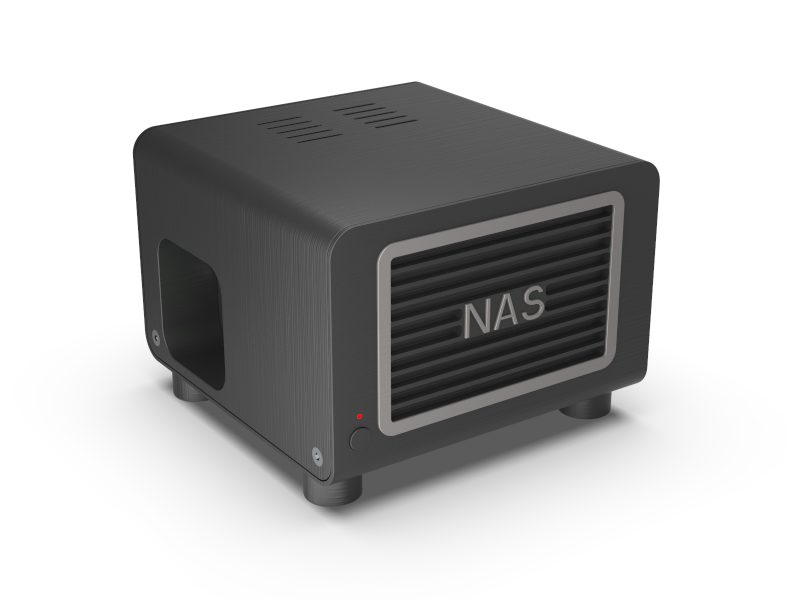
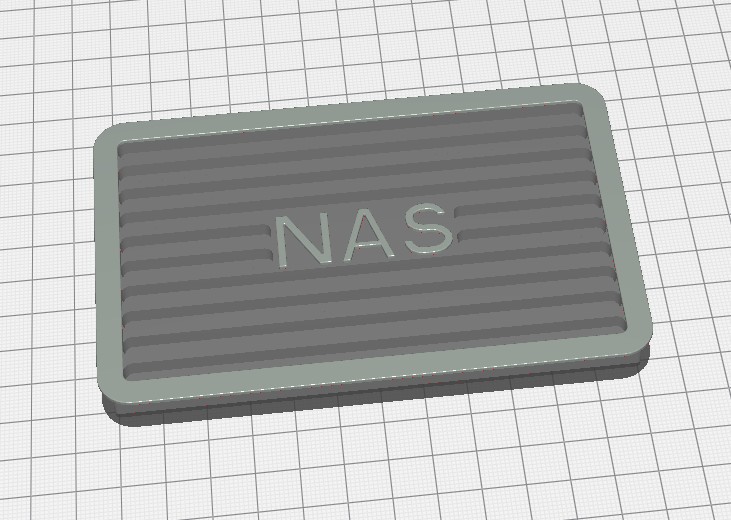
As an example I use my Raspberry Pi UC case with a two colour NAS cover front that you can download from Thingiverse. You can find more information about the Raspberry Pi UC project on Multimedia4Linux.
Attention
Please note the following Cura bugs:
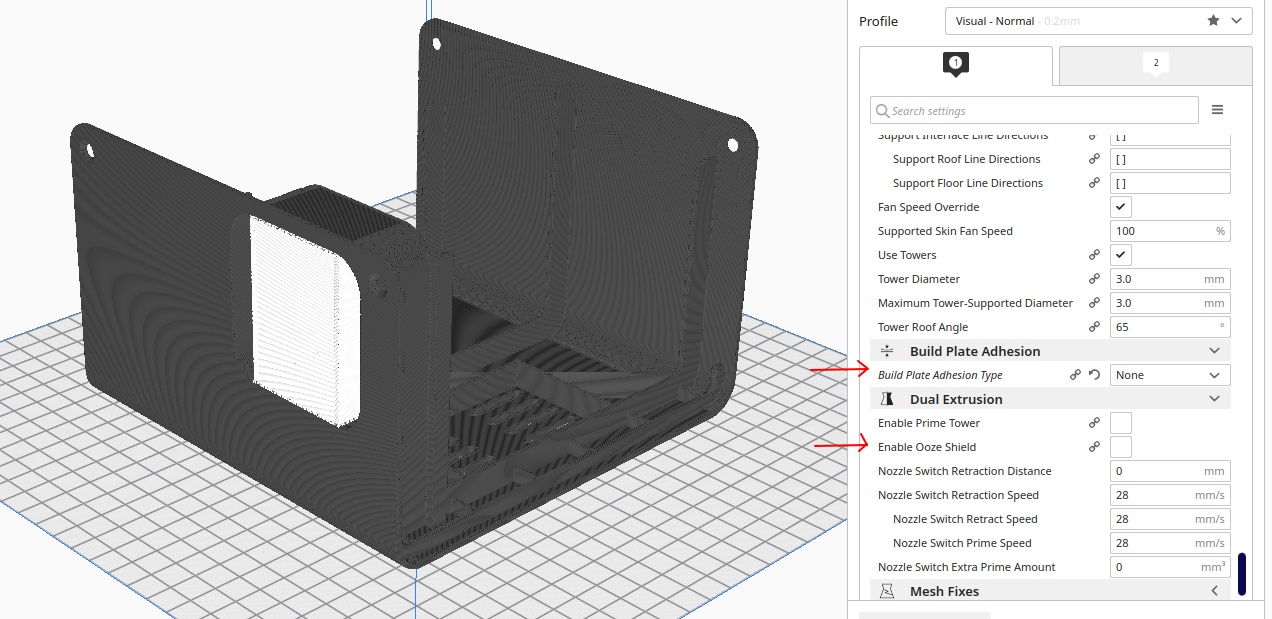
- In Cura 4.13, 5.0, 5.1 and possibly older versions, an bug has crept into the dual mode. In dual mode, if you set the Build Plate Adhesion setting to None, the printer always starts with the right extruder. Since the Weedo X40 with firmware 1.2.5 does not cope well with this, you should always set Skirt, Brim or Raft.
Good to know
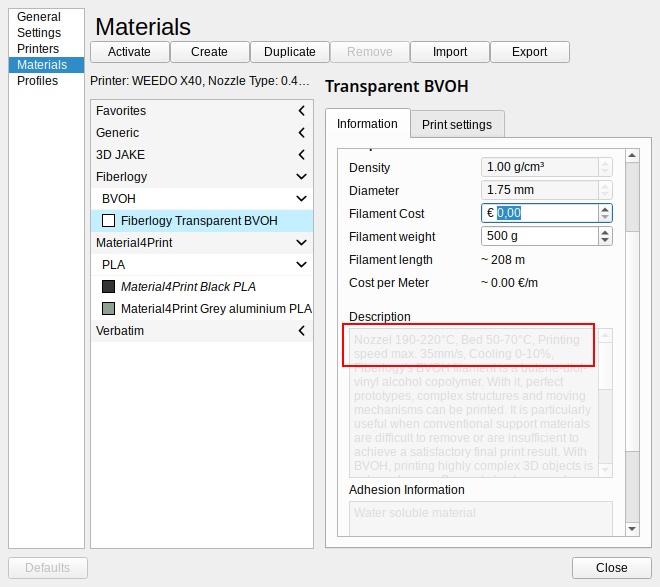
With a dual extruder, the nozzle temperature and printing speed can be set for each nozzle. The temperature of the print bed is the same for both. Water-soluble support material can only be used up to a certain temperature, so it must be checked before printing whether the heating bed has not been set too high by the printing material from the left extruder. Only required if the support material is in contact with the build bed. For the x40 Cummunity materials, you will find information on the permissible temperature in the material description.
If you only use one nozzle from the printer, then you should deactivate the second. Without deactivation, the settings of the hot bed may be changed by the selected material!
Requirement for the use of a dual extruder with two colours
To print a 3D object with two colors, a separate 3D model must be available for each color, in which the origin of the coordinates is identical. In addition, the coordinate system must not be somewhere in the room, but should be aligned with one or more edges of the 3D model. It is best if the XY plane corresponds to the bed contact surface.
In our example we want to print a front cover in two colors. The main body should be black and the frame and the font should form the color accent over silver. The base body and frame with the font are each saved in an STL file and are correctly positioned on top of one another if both are installed on the coordinate origin.
In order for the example to lie, the materials must adhere to one another or fuse with one another. The two materials must therefore be compatible. You get the best compatibility if you use the same types of material from the same manufacturer and only the colors differ. Most of the time it works if you use the same type of material from different manufacturers. When making your selection, however, you should ensure that the materials can be printed in the same temperature range.
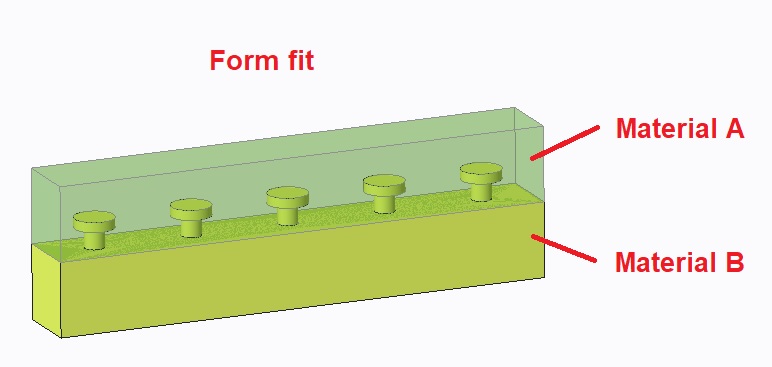
Some incompatible materials can also be connected to one another if a form fit was taken into account in the design. The materials then do not adhere properly to one another, but the "interlocking" means that the components cannot be separated.
Creation of a two color print with Cura
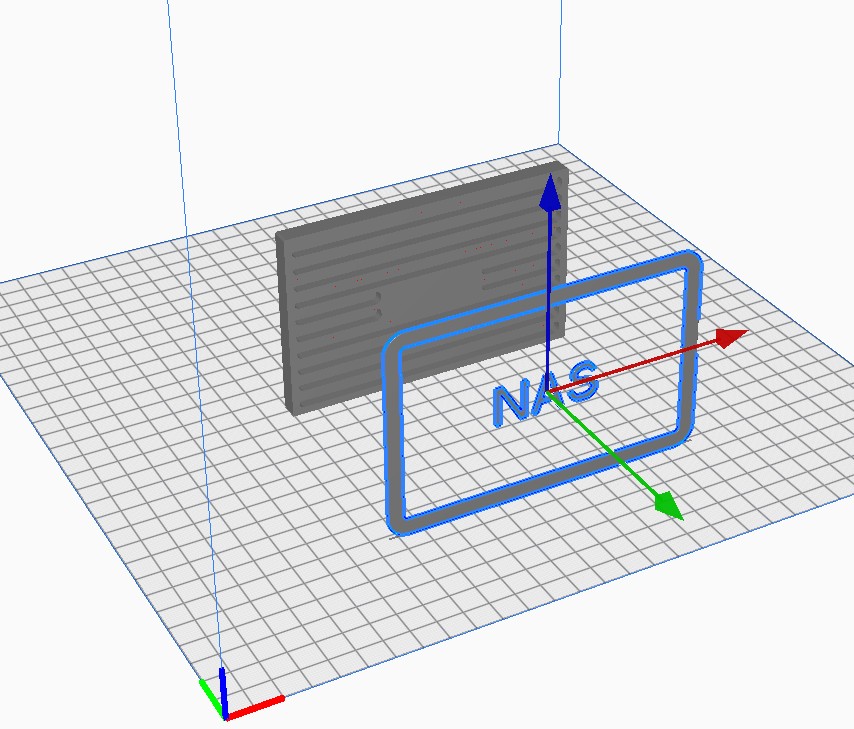
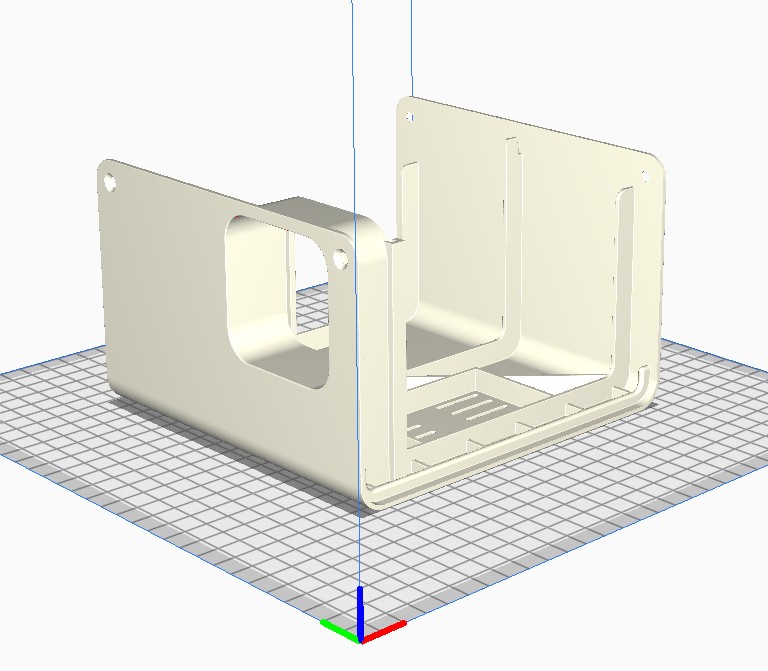
Load the two models in Cura as shown in the picture above. Select the 3D model that you want to print with the extruder on the left. Right mouse click on "Extruder Left" or press CTRL + 1. Now select the model that is to be printed with the right extruder and select the corresponding extruder again with the right mouse button or press CTRL + 2.
Select now the two models that go together. In our example you can click on "Select all models" with the right mouse button or press CTRL + A. Now select "Merge Models" with the right mouse button or press CTRL + ALT + G. If the 3D models had the correct origin, then the models should now be correctly assembled. Now align the merged model on the platform.
Select the desired material in the desired color for the left and right extruder.
The model should now look similar to the desired print result. Unfortunately, Cura cannot display the colors correctly. Silver therefore looks like gray. The color representation also seems to depend on the operating system. If, for example, you can no longer see details due to the black color, you can change the visual representation in the preview after slicing via the color scheme or preview type without this affecting the G-code.
Now select the desired quality profile with the desired layer height.
In the Cura settings, make sure that Wall Extruder, Outer Wall Extruder and Inner Wall Extruder are set to Not overridden. If necessary, you can still activate the support and select the extruder for the support structure. Also check under Dual Extruder whether the Ooze Shield is activated. If not, you should activate it for two-color printing. For more information, see What Is a Wipe Wall or Ooze Shield?
To understand the example, you can download the 3D models from Thingiverse.
Requirement for the use of a dual extruder with water soluble support material
If you want to print complex components with e.g. large bridges and the surface should only look good, then it is not a question of using a soluble support material. Different support materials such as PVA or BVOH are offered on the market. These support materials can only be printed in a limited temperature range. If the temperature is too high, the nozzle can clog. In addition, the materials also adhere to the various plastics to different degrees. Before buying, you should therefore check carefully whether the water-soluble material is suitable for your print. The water-soluble materials are also expensive and tend to absorb water very quickly. Dry storage in a vacuum bag is therefore very important.
The following material will be supported in the X40 community configuration in the future:
- Verbatim BVOH
- Fiberlogy BVOH
- 3DJake nicePVA
Creation of a print with water soluble support material
In the example we want to print the upper part of the Raspberry Pi UC's housing. The top has a large hole in the side wall and cannot be printed without a support structure. To get a nice surface we use a water-soluble material. We load the upper part of the housing in Cura and align it on the platform.
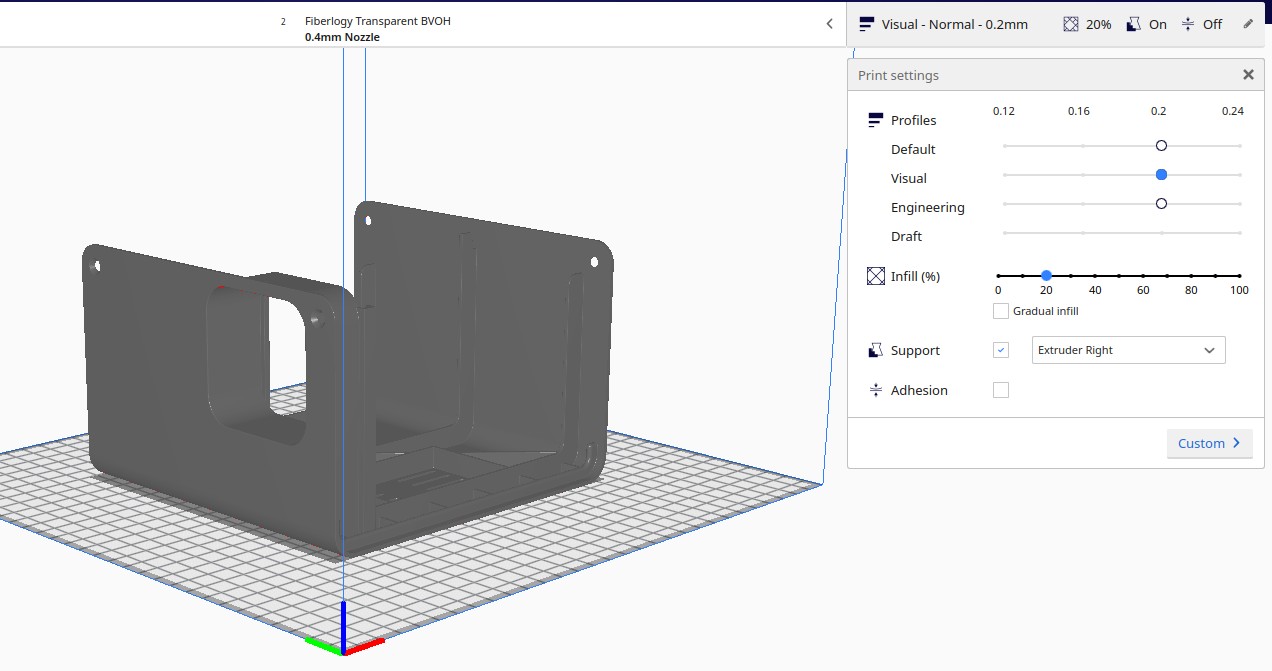
Select the model and assign it to the left extruder (extruder 1). You can do this in Cura using the toolbar on the left or using the right mouse button. Now set the desired printing material for the housing for the left extruder and the desired support material for the right extruder. I use Material4Print PLA in black for extruder left and Fiberlogy BVOH for extruder right. Now activate support and set Extruder Right for support.
Since the "Support Overhang Angle" is set to 45 ° by default, slicing would result in an unnecessary support structure on the radius between the platform and the side wall. To save material, we can prevent this with a support structure blocker or by changing the support overhang angle. Rotate the model so that you are viewing it at an angle from below. Everything marked in red represents an overhang / bridge and would be provided with a support structure.
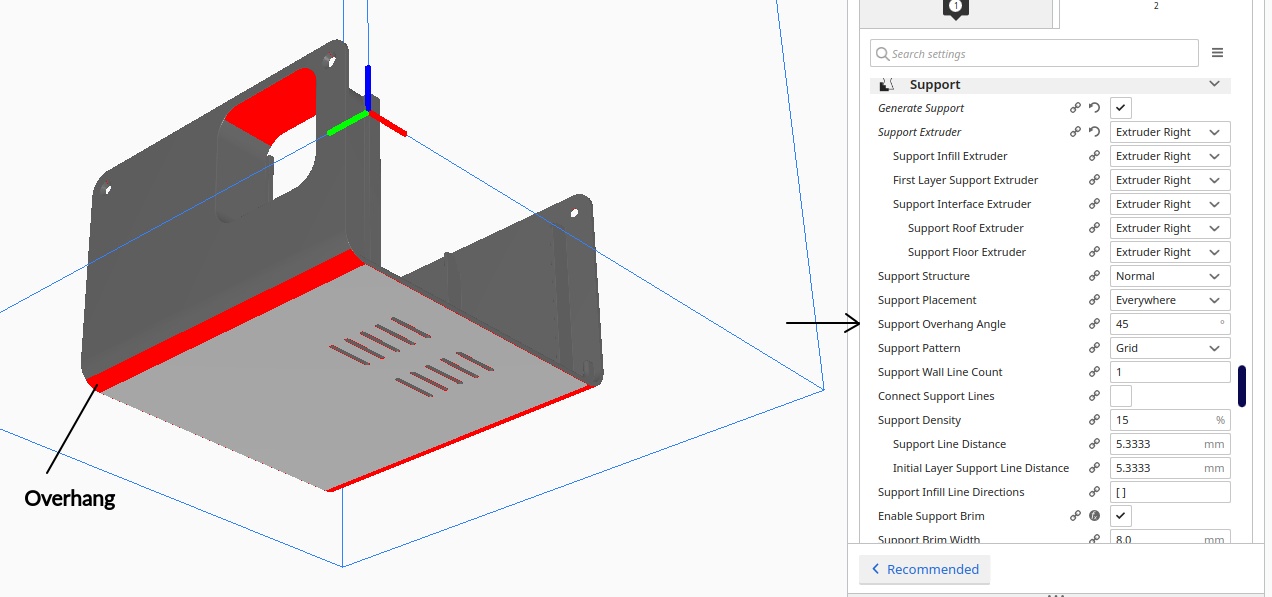
We set the spupport overhang angle on extruder 1 to 80 °. Since the contact area is very large, no brim / skirt or the like is required, we therefore go into the section Build Plate Adehesion and Type none, if something else is stated. We also check under Dual Extrusion whether Ooze Shield is deactivated or deactivate it. After slicing, the preview model should look like this:
Known Cura Idex bugs